
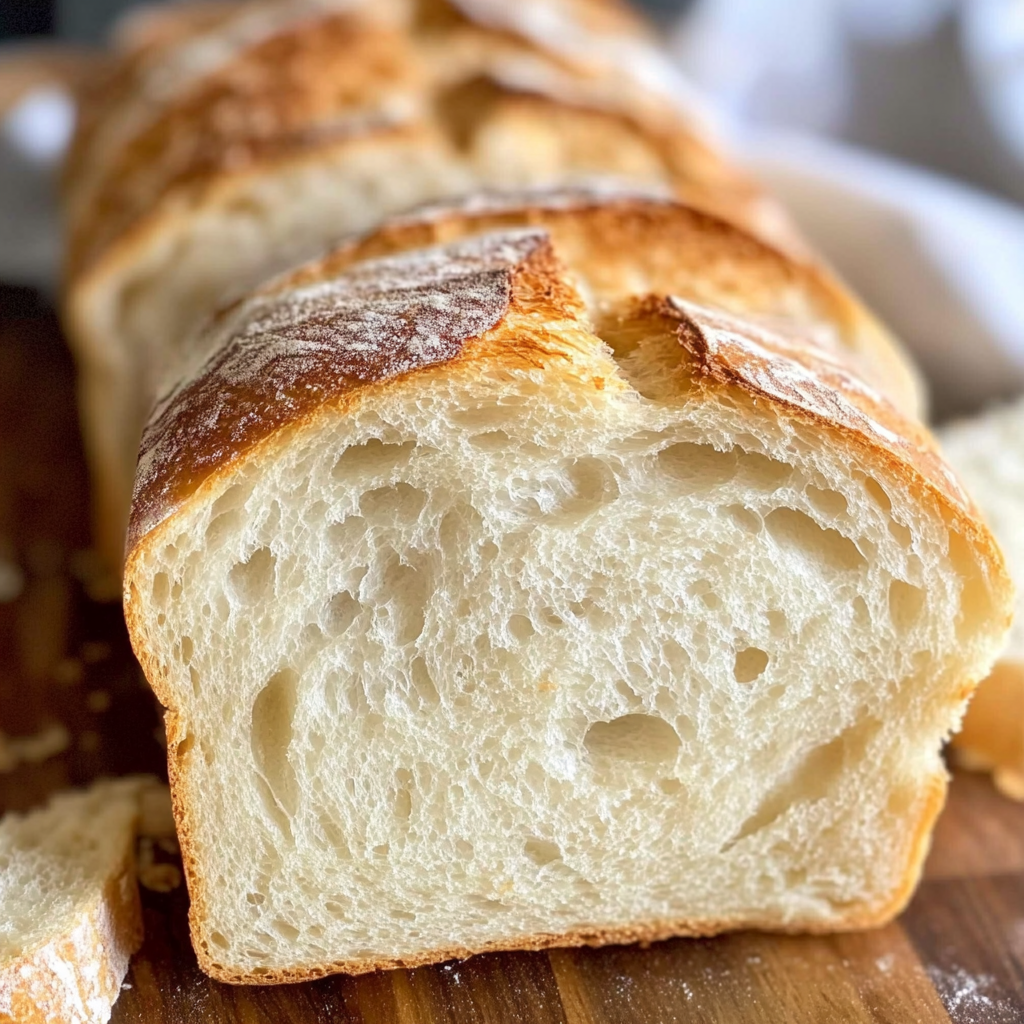
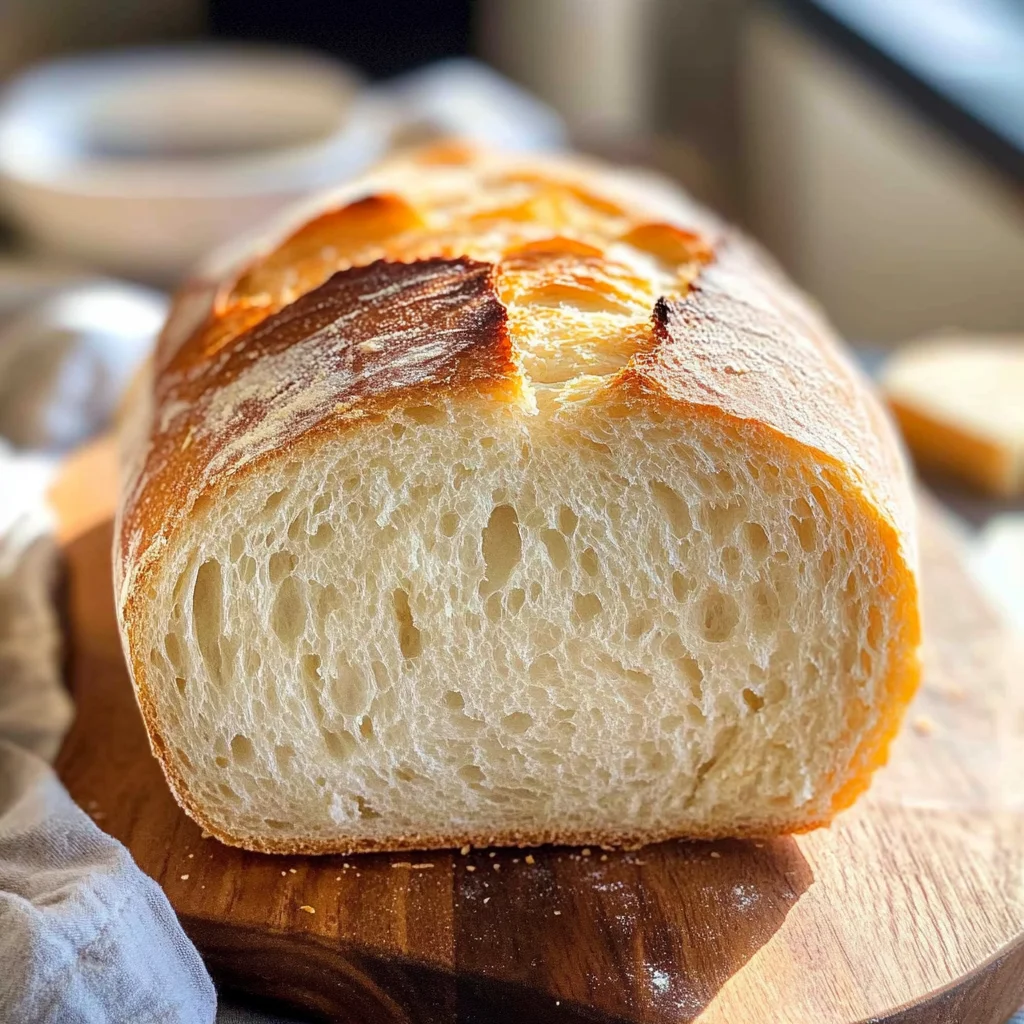
Look no further for the BEST and simplest Homemade Bread recipe made with just six simple pantry ingredients! This delightful bread is perfect for sandwiches, toasting, or simply enjoying fresh out of the oven. Its unique qualities include a soft, fluffy texture and a wonderful aroma that fills your kitchen. Whether you’re hosting a gathering or looking for a comforting meal at home, this homemade bread fits any occasion.
Why You’ll Love This Recipe
- Simple Ingredients: With just six pantry staples, making bread at home has never been easier.
- Versatile Uses: Perfect for sandwiches, toast, or as a side to your favorite soups and salads.
- Freezes Well: Make extra loaves and store them in the freezer for quick meals later.
- Fresh Aroma: Enjoy the irresistible smell of freshly baked bread wafting through your home.
- Customizable: Easily add herbs, spices, or seeds to personalize your bread.
Tools and Preparation
Before you begin baking your homemade bread, gather the necessary tools. Having everything ready will make the process smooth and enjoyable.
Essential Tools and Equipment
- Stand mixer or large mixing bowl
- Measuring cups and spoons
- Baking pans (9×5 inches)
- Dish towel or plastic wrap
- Wire cooling rack
Importance of Each Tool
- Stand mixer: Saves time and effort while kneading dough, ensuring a consistent texture.
- Baking pans: The right shape helps achieve the perfect loaf size and crust.
Ingredients
To create this delicious homemade bread, you will need the following ingredients:
- 2 cups warm water (105-115 degrees) ((474g))
- 1 Tablespoon active dry yeast*
- 1/4 cup honey or sugar ((85g honey, 50g sugar))
- 2 teaspoons salt
- 2 Tablespoons oil (canola or vegetable) ((30 ml))
- 4 – 5 1/2 cups all-purpose or bread flour* ((500g-688g))
How to Make Homemade Bread
Step 1: Prepare the Dough
In a large bowl or stand mixer, add the yeast, warm water, and a pinch of honey or sugar. Allow it to rest for 5–10 minutes until foaming and bubbly. This process is known as proofing the yeast; if it doesn’t foam, use fresh yeast.
Step 2: Mix Additional Ingredients
Add the remaining honey or sugar, salt, oil, and 3 cups of flour to the yeast mixture. Mix until combined.
Step 3: Add More Flour
Stir in another cup of flour. While mixing on low speed (or by hand), gradually add more flour—½ cup at a time—until the dough pulls away from the sides of the bowl. It should be smooth and elastic but still slightly sticky.
Step 4: Knead the Dough
Knead the dough using a stand mixer on medium speed for about 4–5 minutes. If kneading by hand, do so on a lightly floured surface for approximately 5–8 minutes until smooth.
Step 5: First Rise
Grease a large bowl with oil or cooking spray. Place the dough inside and turn to coat it with oil. Cover with a dish towel or plastic wrap. Let rise in a warm place until doubled in size—about 1½ hours.
Step 6: Prepare Pans
Generously spray two 9×5 inch bread pans with cooking spray on all sides. Optionally line the bottom with parchment paper.
Step 7: Shape Loaves
Punch down the risen dough to remove air bubbles. Divide it into two equal portions. Shape each portion into long logs and place them into greased loaf pans.
Step 8: Second Rise
Cover the pans with a lightweight dish towel (or oiled plastic wrap). Allow them to rise again for about 45 minutes to an hour until risen about one inch above the pans.
Step 9: Bake the Bread
Preheat your oven to 350°F (175°C). Bake the loaves for about 30–33 minutes until golden brown on top. Tap gently on top; it should sound hollow when done.
Step 10: Cool Down
Invert the loaves onto a wire cooling rack. Brush tops with butter if desired and allow cooling for at least ten minutes before slicing.
Step 11: Storage Tips
Once cooled, store your homemade bread in an airtight container or bag at room temperature for up to three days or refrigerate for up to five days.
With this straightforward Homemade Bread recipe, you’ll enjoy baking fresh loaves that fill your home with warmth and flavor!
How to Serve Homemade Bread
Homemade bread is versatile and can be enjoyed in many delicious ways. Whether you are serving it warm right out of the oven or using it as a base for a meal, there are countless options.
Toasted with Toppings
- Avocado Toast – Spread creamy avocado on toasted slices and top with salt, pepper, and chili flakes for a nutritious snack.
- Peanut Butter & Banana – A classic combination that makes for an energy-boosting breakfast or snack option.
Sandwiches
- Turkey Sandwich – Layer sliced turkey with lettuce, tomato, and your favorite condiments for a quick lunch.
- Veggie Sandwich – Load up with cucumbers, bell peppers, spinach, and hummus for a refreshing vegetarian option.
Dipping
- Breadsticks with Olive Oil – Serve warm slices alongside olive oil mixed with balsamic vinegar for an easy appetizer.
- Garlic Bread – Brush slices with garlic-infused oil and bake until golden brown for a delicious side dish.
How to Perfect Homemade Bread
Achieving the perfect homemade bread requires careful attention to detail. Here are some tips to help you along the way.
- Use Warm Water – Ensure the water temperature is between 105-115 degrees Fahrenheit to activate the yeast properly.
- Knead Properly – Knead the dough until it becomes smooth and elastic; this helps develop gluten for better texture.
- Proof Your Yeast – Always check if your yeast is active by allowing it to foam before mixing in other ingredients.
- Monitor Rising Time – Allow the dough to rise in a warm place until it doubles in size; this ensures a light and airy loaf.
- Avoid Overbaking – Keep an eye on your bread as it bakes; the loaves should sound hollow when tapped on the bottom.
Best Side Dishes for Homemade Bread
Homemade bread pairs beautifully with various side dishes. Here are some great options that complement its flavors.
- Garden Salad – A fresh mix of greens, tomatoes, cucumbers, and dressing brings brightness to your meal.
- Creamy Soup – Tomato or butternut squash soup pairs perfectly with warm bread for dipping.
- Cheese Platter – Serve assorted cheeses alongside fruits and nuts for a delightful appetizer spread.
- Roasted Vegetables – Seasonal roasted veggies add flavor and nutrition to any meal where bread is served.
- Potato Salad – A chilled potato salad can be a satisfying side that balances warmth from the bread.
- Pasta Primavera – Light pasta dishes loaded with vegetables make an excellent accompaniment to homemade bread.
Common Mistakes to Avoid
Making homemade bread can be easy, but there are common mistakes that can affect the outcome. Here are some pitfalls to watch out for:
- Not proofing the yeast: Always ensure your yeast is active by letting it foam in warm water with a bit of sugar. If it doesn’t bubble, start with fresh yeast.
- Using cold ingredients: Make sure your water is warm (105-115°F) to help activate the yeast properly. Cold ingredients can hinder dough rising.
- Skipping kneading time: Knead the dough for adequate time to develop gluten, which contributes to bread texture. Rushing this step may lead to dense bread.
- Over or under flouring: Measure flour correctly and add gradually until the dough is just slightly sticky. Too much flour can dry out the bread.
- Not letting it rise enough: Allow the dough ample time to rise until it has doubled in size. Insufficient rising leads to flat bread.
Storage & Reheating Instructions
Refrigerator Storage
- Store homemade bread in an airtight container or bag.
- It can last for up to 5 days in the refrigerator.
Freezing Homemade Bread
- Wrap the loaves tightly in plastic wrap and then aluminum foil.
- You can freeze homemade bread for up to 3 months.
Reheating Homemade Bread
- Oven: Preheat to 350°F and wrap bread in foil; heat for about 10-15 minutes.
- Microwave: Place a slice on a microwave-safe plate and cover with a damp paper towel; heat for 10-15 seconds.
- Stovetop: Heat slices in a skillet over low heat for about 1-2 minutes per side until warm.
Frequently Asked Questions
Here are some common questions about making homemade bread:
How do I know when my dough has risen enough?
The dough should double in size during its first rise. A good test is to gently poke it; if it springs back slowly, it’s ready.
Can I use whole wheat flour instead of all-purpose flour for homemade bread?
Yes, you can substitute whole wheat flour, but you may need to adjust the liquid and add more kneading time.
What should I do if my homemade bread is too dense?
If your bread turns out dense, ensure that yeast is fresh, give enough rising time, and avoid adding too much flour during mixing.
How can I customize my homemade bread recipe?
You can add herbs, seeds, or even dried fruits to enhance flavor and texture according to your preference!
Final Thoughts
This Homemade Bread recipe is not only simple but also versatile! Perfect for sandwiches or as a side dish, you can easily adapt it by adding spices or other ingredients. We encourage you to try making this delightful bread at home—you won’t be disappointed!
Print
Homemade Bread
This vibrant cheesecake combines bright lemon and lime flavors with a rich, creamy filling on a buttery crust. Finished with sweet cherry topping and crunchy pistachios, it delivers a refreshing balance of tangy, sweet, and nutty flavors. It’s an eye-catching dessert that feels special enough for celebrations yet simple enough to enjoy anytime.
- Total Time: 5 hours 20 minutes
Ingredients
For the crust
1 1/2 cups graham cracker crumbs
1/4 cup granulated sugar
1/2 cup unsalted butter, melted
For the filling
3 (8-ounce) packages cream cheese, softened
1 cup granulated sugar
1/2 cup sour cream
1/4 cup heavy cream
3 large eggs
1 tablespoon lemon zest
1 tablespoon lime zest
1/4 cup fresh lemon juice
1/4 cup fresh lime juice
1 teaspoon vanilla extract
For the topping
1 cup cherry pie filling (fresh or canned)
1/4 cup chopped pistachios
Fresh mint leaves, optional garnish
Instructions
- Preheat your oven to 325°F (165°C). Lightly grease a 9-inch springform pan.
- In a bowl, mix graham cracker crumbs, sugar, and melted butter until evenly combined. Press the mixture firmly into the bottom of the prepared pan. Bake for 8–10 minutes, then remove and let cool.
- In a large bowl, beat the cream cheese and sugar with an electric mixer until smooth and creamy.
- Mix in sour cream and heavy cream until fully incorporated.
- Add eggs one at a time, beating on low speed after each addition just until blended.
- Stir in lemon zest, lime zest, lemon juice, lime juice, and vanilla extract. Mix gently until smooth.
- Pour the filling over the cooled crust and smooth the top with a spatula.
- Bake for 50–55 minutes, or until the edges are set and the center has a slight jiggle.
- Turn off the oven, crack the door open, and let the cheesecake cool inside for 1 hour to prevent cracking.
- Remove from the oven and refrigerate for at least 4 hours, or until fully chilled.
- Before serving, spread cherry pie filling over the top. Sprinkle with chopped pistachios and garnish with mint leaves if desired.
- Slice, serve chilled, and enjoy.
- Prep Time: 25 minutes
- Cook Time: 55 minutes


Leave a Comment