

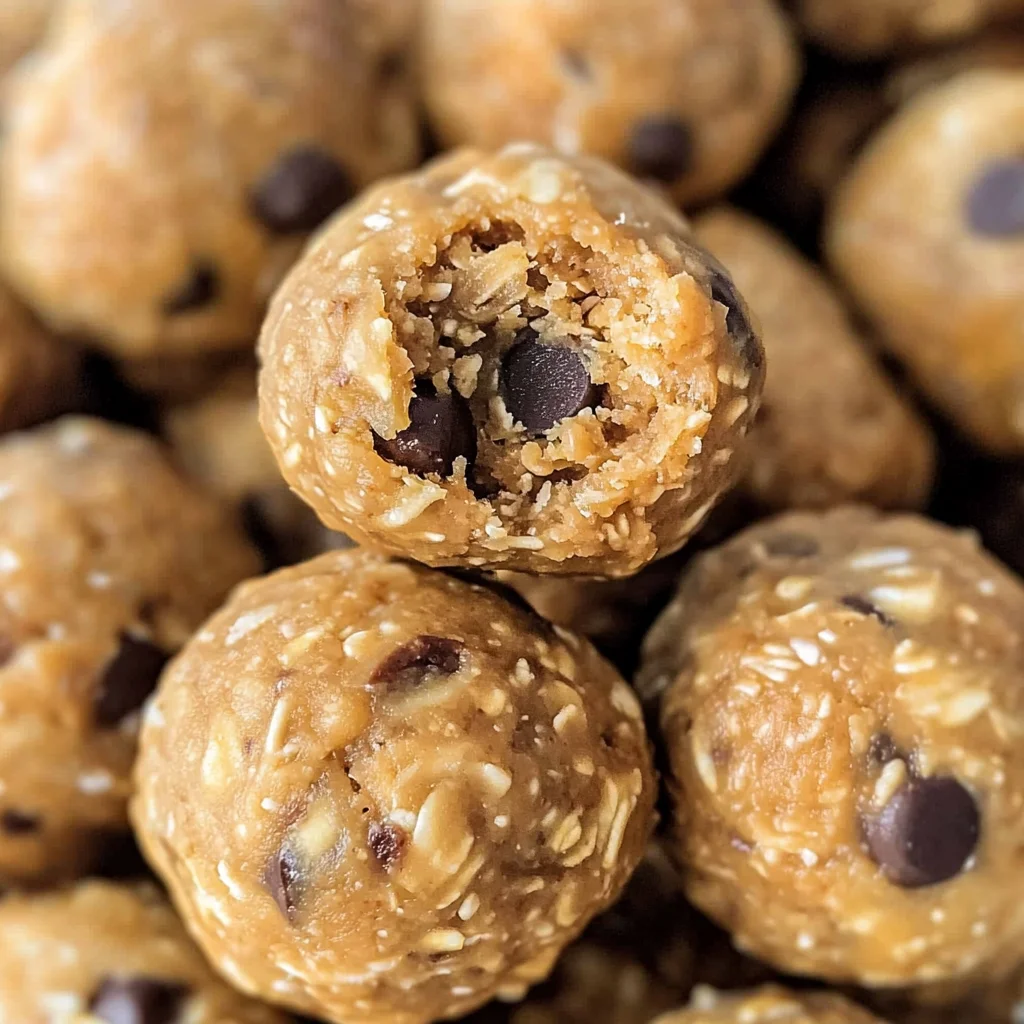
The No Bake Protein Balls recipe is the perfect solution for those busy days when you need a quick, nutritious snack. These delightful bites are not only easy to make but also packed with energy-boosting ingredients. Ideal for on-the-go munching, post-workout recovery, or simply satisfying your sweet tooth without the guilt, these protein balls are sure to become a staple in your kitchen.
Why You’ll Love This Recipe
- Quick and Easy: This recipe takes just 10 minutes to prepare, making it perfect for busy schedules.
- Healthy Snack Option: Packed with protein and healthy fats, these bites are a great way to fuel your day.
- Versatile Flavor: The combination of peanut butter and chocolate makes these energy balls irresistibly delicious.
- No Baking Required: Simply mix, roll, and chill—no oven needed!
- Batch-Friendly: Make a big batch and store them for an easy snack throughout the week or month.
Tools and Preparation
To make your No Bake Protein Balls efficiently, you’ll need some essential tools in your kitchen.
Essential Tools and Equipment
- Mixing bowl
- Rubber spatula
- Mini cookie scoop or spoon
- Wax paper
- Cookie sheet
Importance of Each Tool
- Mixing bowl: A large mixing bowl allows you to easily combine all ingredients without spilling.
- Rubber spatula: This tool helps you mix thoroughly and scrape down the sides of the bowl efficiently.
- Mini cookie scoop or spoon: Perfect for portioning out uniform-sized energy balls every time.
Ingredients
The best easy no bake protein balls recipe made with just 6 ingredients! These oatmeal energy bites are made with protein powder for a filling and healthy snack.
For the Protein Balls
- 1 1/2 cups no stir creamy peanut butter
- 1/2 cup honey
- 1 1/3 cups old fashioned oats (rolled oats)
- 1/2 cup vanilla protein powder
- 1/8 teaspoon salt
- 1/2 cup mini chocolate chips
How to Make No Bake Protein Balls
Step 1: Prepare the Mixture
Add the no stir creamy peanut butter, honey, rolled oats, vanilla protein powder, salt, and mini chocolate chips to a mixing bowl. Use a rubber spatula to mix until everything is well combined.
Step 2: Scoop the Mixture
Use a mini cookie scoop or a spoon to drop small portions of the mixture onto a wax paper-covered cookie sheet. Aim for about 1 inch in size for each energy ball.
Step 3: Shape the Balls
Roll each portion into a ball using your hands. This helps ensure they hold together well after chilling.
Step 4: Chill Until Firm
Place the cookie sheet with the energy bites in the fridge for about 1 hour. This allows the balls to firm up nicely.
Step 5: Store Your Energy Balls
Transfer the chilled energy balls into a Ziploc bag. They can be stored in the fridge for about a week or in the freezer for 2-3 months.
Bonus Tip:
Be sure to check out my Energy Bites Cookbook based on this recipe plus more than 20 other flavors you’ll love!
How to Serve No Bake Protein Balls
No bake protein balls are a versatile snack that can be enjoyed in various ways. Whether you need a quick energy boost or a satisfying treat, here are some creative serving suggestions.
As a Breakfast Option
- Pair with yogurt: Add your favorite yogurt and fresh fruit for a balanced breakfast.
- Sprinkle on oatmeal: Chop the protein balls and mix them into your morning oatmeal for added flavor and texture.
Pre-Workout Snack
- Energy booster: Enjoy a protein ball about 30 minutes before your workout for sustained energy.
- Hydration pairing: Drink with water or coconut water to stay hydrated.
Afternoon Pick-Me-Up
- With tea or coffee: Serve alongside your afternoon beverage to satisfy sweet cravings.
- On a cheese platter: Include them on a platter with cheese and fruits for an interesting snack mix.
Dessert Alternative
- Ice cream topping: Crumble over vanilla ice cream for a healthier dessert twist.
- Chocolate dip: Dip half in melted dark chocolate for an indulgent treat.
How to Perfect No Bake Protein Balls
Creating perfect no bake protein balls requires attention to detail and the right techniques. Here are some helpful tips to ensure great results every time.
- Choose the right peanut butter: Use no stir creamy peanut butter for smooth consistency and easy mixing.
- Measure ingredients accurately: Precision is key; use measuring cups and spoons for the best texture.
- Chill properly: Allow the energy balls to chill in the fridge for at least one hour to firm up before serving.
- Experiment with flavors: Feel free to add spices like cinnamon or nutmeg, or substitute different nut butters for variety.
- Store correctly: Keep them in an airtight container in the fridge or freezer to maintain freshness.
- Customize add-ins: Try incorporating dried fruits, seeds, or alternative flavors of protein powder to suit your taste.
Best Side Dishes for No Bake Protein Balls
Pairing no bake protein balls with complementary side dishes can enhance your snacking experience. Here are some delicious options you might consider.
- Fresh Fruit Salad: A mix of seasonal fruits adds natural sweetness and hydration.
- Veggie Sticks with Hummus: Crunchy veggies paired with creamy hummus provide fiber and essential nutrients.
- Greek Yogurt Parfait: Layer yogurt with granola and berries for a filling snack.
- Nut Mix: A handful of mixed nuts offers healthy fats and extra protein alongside your protein balls.
- Rice Cakes with Nut Butter: Spread almond or cashew butter on rice cakes for a crunchy, satisfying snack.
- Smoothie Bowl: Blend your favorite fruits with spinach or kale and top it off with chopped protein balls for added texture.
Common Mistakes to Avoid
When making No Bake Protein Balls, it’s easy to run into a few common pitfalls. Here are some mistakes to avoid for the best results.
- Incorrect measurements: Using too much or too little of an ingredient can affect the texture and flavor. Always measure your ingredients carefully.
- Skipping refrigeration: If you don’t chill the energy balls, they may be too soft and difficult to handle. Allow them to firm up in the fridge for at least one hour.
- Not mixing thoroughly: Failing to mix the ingredients well can lead to uneven flavor or texture. Use a rubber spatula and ensure everything is fully combined.
- Using the wrong type of oats: Instant oats or quick oats do not work as well as old-fashioned rolled oats. Stick with rolled oats for the best texture.
- Overloading on add-ins: While extras like nuts or seeds can enhance the recipe, adding too many can make it hard for the mixture to hold together. Keep add-ins balanced.
Storage & Reheating Instructions
Refrigerator Storage
- Store in an airtight container for up to one week.
- Keep them in the fridge to maintain their firmness.
Freezing No Bake Protein Balls
- Place energy balls in a ziplock bag or airtight container.
- They can be frozen for 2-3 months without losing flavor.
Reheating No Bake Protein Balls
- Oven: Preheat to 350°F (175°C) and warm for 5-10 minutes until slightly softened.
- Microwave: Heat for 10-15 seconds at a time until warm but not hot.
- Stovetop: Place on a low heat skillet for a few minutes, turning occasionally until warmed through.
Frequently Asked Questions
Here are some frequently asked questions about No Bake Protein Balls that might help you out!
Can I use different nut butter instead of peanut butter?
You can definitely swap peanut butter for almond butter or cashew butter. Just ensure it’s creamy and smooth for the best results.
How do I customize my No Bake Protein Balls?
Feel free to add other ingredients like dried fruits, seeds, or different flavored protein powders. The possibilities are endless!
How long do No Bake Protein Balls last?
These energy bites will last up to a week in the refrigerator and can be frozen for up to three months.
Are these No Bake Protein Balls healthy?
Yes! They are packed with protein and made with wholesome ingredients, making them a nutritious snack option.
Final Thoughts
These No Bake Protein Balls are not only easy to prepare but also incredibly versatile. You can customize them based on your tastes by adding different nuts, seeds, or even swapping out sweeteners. Give this recipe a try and enjoy a deliciously healthy snack anytime!
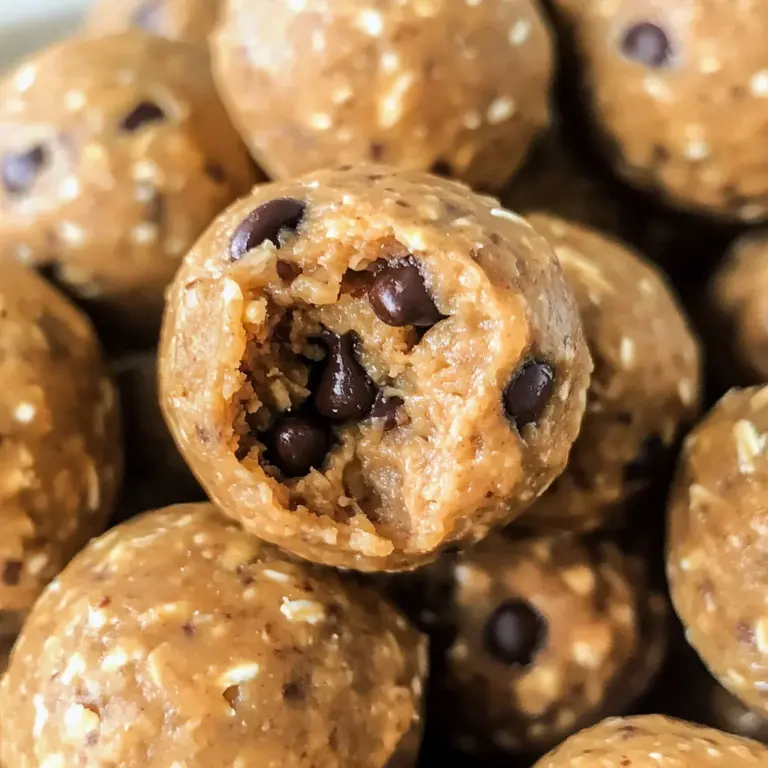
No Bake Protein Balls
No Bake Protein Balls are the ultimate go-to snack for those busy days when you need a quick yet nutritious boost. With just six simple ingredients, these delightful energy bites combine creamy peanut butter and chocolate for a guilt-free treat that’s perfect for on-the-go munching, post-workout recovery, or satisfying your sweet cravings. Best of all, there’s no baking required—just mix, roll, and chill! These protein-packed snacks are versatile enough to customize with your favorite add-ins, making them a staple in your kitchen.
- Total Time: 0 hours
- Yield: Approximately 20 servings 1x
Ingredients
- 1 1/2 cups no stir creamy peanut butter
- 1/2 cup honey
- 1 1/3 cups old-fashioned oats
- 1/2 cup vanilla protein powder
- 1/8 teaspoon salt
- 1/2 cup mini chocolate chips
Instructions
- In a mixing bowl, combine peanut butter, honey, rolled oats, protein powder, salt, and mini chocolate chips. Mix well with a rubber spatula until fully combined.
- Using a mini cookie scoop or spoon, portion out small amounts (about 1 inch) onto a wax paper-covered cookie sheet.
- Roll each portion into balls using your hands to ensure they hold together.
- Chill the cookie sheet in the refrigerator for about one hour to firm up the energy bites.
- Store the chilled protein balls in an airtight container in the fridge for up to a week or freeze them for up to three months.
- Prep Time: 10 minutes
- Cook Time: None
- Category: Snack
- Method: No Bake
- Cuisine: American
Nutrition
- Serving Size: 1 energy ball (30g)
- Calories: 130
- Sugar: 6g
- Sodium: 50mg
- Fat: 7g
- Saturated Fat: 1g
- Unsaturated Fat: 6g
- Trans Fat: 0g
- Carbohydrates: 15g
- Fiber: 2g
- Protein: 4g
- Cholesterol: 0mg

Leave a Comment